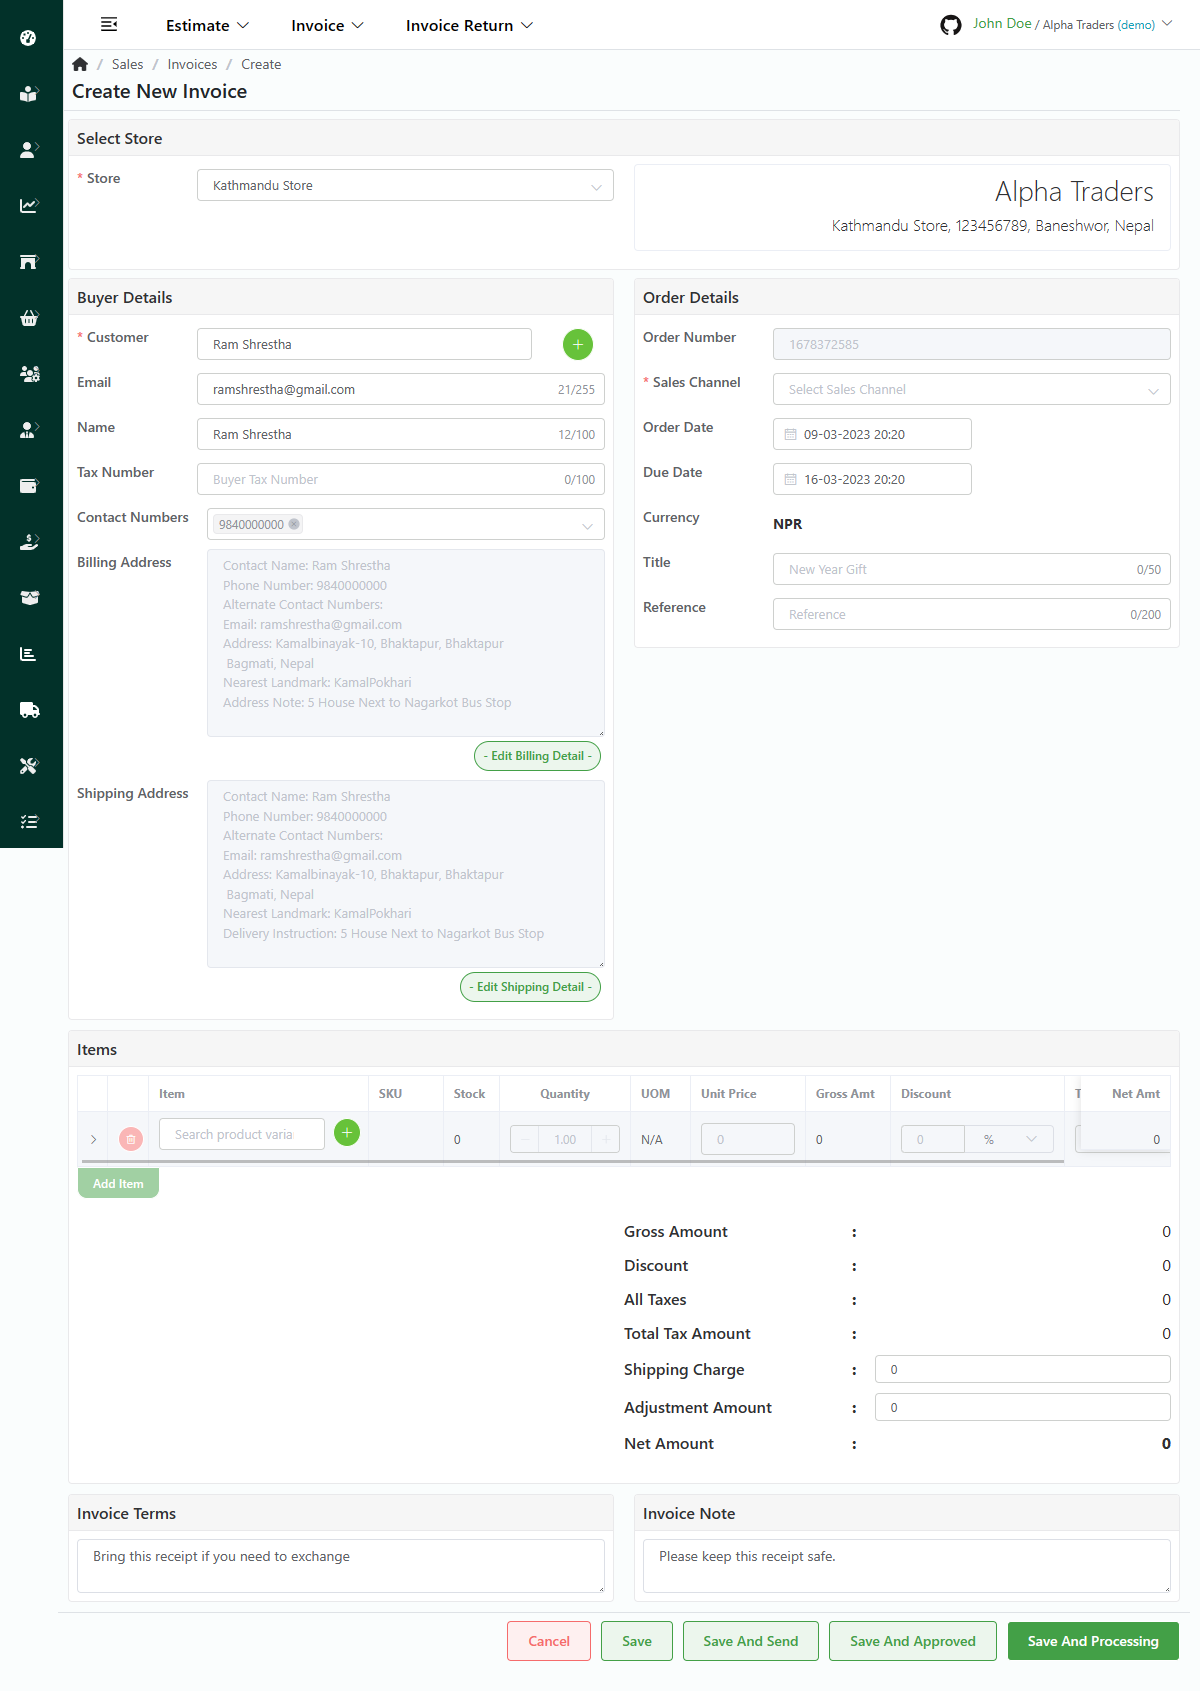
add-invoice
Add Invoice
Create an invoice sales order made by a customer.
Direct Link: https://app.meroerp.com/sales/invoices/create

Log in to your MeroERP account.
On the left navigation menu, browse to Sales > Create Invoice +.
Select the respective store.
Note: If you have only one store, it will be automatically selected.To search for an existing customer, simply enter their name in the search bar. If the customer is not found, click on the "+" button to add a new customer.
After selecting store and customer, the Buyer Details and Items panel will be unlocked.
In Buyer Details, the customer's information will be auto-filled. You may change these details if needed.
- Customer
- Name
- Tax Number
- Contact Numbers
- Billing Address
- Shipping Address
In Order Details, fill in the following fields.
- Order Number: This is auto-generated.
- *Sales Channel: Select the sales channel
- Order Date: The date on which the order was placed.
- Due Date: The date by which order should be completed.
- Title: A short description of the order.
- Reference: Any reference information related to the order.
In Items Panel, add item in the invoice by entering the variant name or variant SKU ID. Then, make changes in the following fields.
- *Quantity: Set the quantity
- *Unit Price: Change unit price if needed
- Discount: Add discount if applicable. You have two options: Percentage or Fixed Amount.
- Tax: If the product has tax added, it will auto add.
If you need to add more items, click on Add Item on the left side of the page and repeat step 8.
If you need to delete any item you added, click on that item's delete button. A confirmation popup wiil appear. Click on Ok and the item will be deleted from the list.
After all items have been added, fill in the Shipping charges if applicable and add any Adjustment amount if you want to.
Her you have four options.
- Click on Save to create an Invoice with Invoice Status: Draft.
- Click on Save And Send to create an Invoice with Invoice Status: Sent.
- Click on Save And Approved to create an Invoice with Invoice Status: Approved.
- Click on Save And Processing to create an Invoice with Invoice Status: Processing.
Note: Invoice with Invoice Status: Processing will be reflected in Main Dashboard, Sales Dashboard and Report.